Crispy on the outside and filled with sweet red bean paste on the inside, Imagawayaki is a popular street snack in Japan.

Snacks come and go, but some street snacks like Imagawayaki (今川焼き) have been enjoyed by Japanese generation after generation. A Japanese snack or dessert with sweet red bean paste filling encased on the inside, Imagawayaki is one of the popular wagashi (和菓子) that’s been around for over 300 years.

What is Imagawayaki (or Obanyaki)?
Imagawayaki (今川焼き) is like a stuffed pancake. The batter is poured into a special cast-iron round grilled pan and grilled until crispy on the outside, and filled with sweet red bean paste.
You might know this dessert by Obanyaki (大判焼き). Depending on the region of Japan, these treats go by different names. The name Imagawayaki is used in the Kanto region (Tokyo area) while Obanyaki is used in the Kansai region (Osaka and Kyoto area).
Imagawayaki was named after the Imagawa Bridge, which is close to where the dessert was first sold in the late 1700s during the Edo period, way before Taiyaki was invented back in the 1900s. Obanyaki was named as the shape of this dessert resembles Oban (an old Japanese coin used at the time).
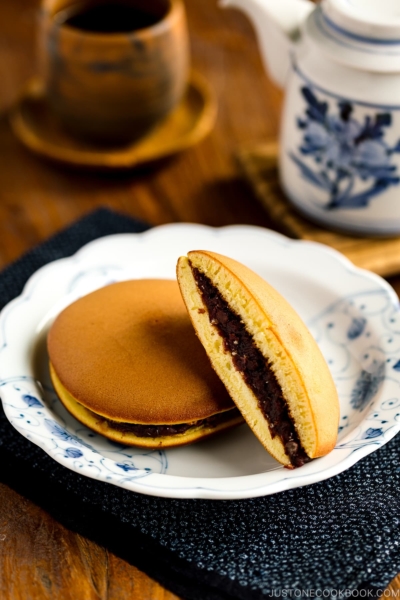
You might think Imagawayaki is similar to Dorayaki and Taiyaki because they are all filled with sweet red bean paste but the texture of each treat is slightly different.

What Can You Fill Imagawayaki (Obanyaki)?
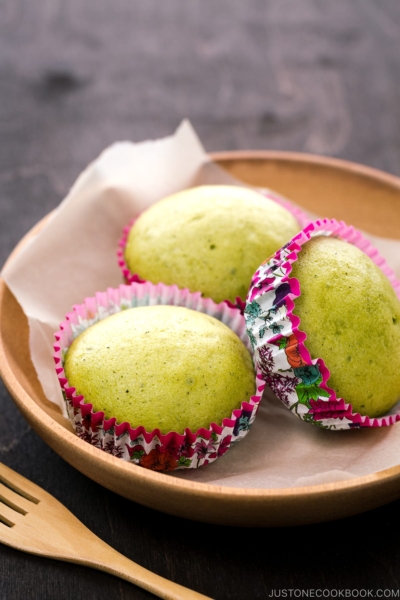
Traditionally, these round disc-shaped treats are filled with sweet red bean paste. Yes, the Japanese have a long history of affection for the sweet red bean. Kind of like the Americans’ love for peanut butter, we even have two types of red bean pastes: tsubuan (chunky) and koshian (smooth). However, in recent years, we are seeing more variety of fillings being offered. From sweet flavors such as vanilla-flavored custard (recipe), matcha (green tea), and chocolate, to savory fillings like curry and cheese, I just love how creative & fun we can get with these sweet snacks!

Where Can You Find Imagawayaki (Obanyaki)?
You can find the snack being sold at Japanese festivals, food stands/shops at Nakamise-Dori (shopping streets toward a popular temple), and underground floors of big department stores (aka Depa Chika).
Where to Buy Imagawayaki Pan

Unlike Dorayaki, you will need an Imagawayaki (Obanyaki) pan. I like this cast-iron pan to create a crisp outer shell. You can find one on Amazon and I bought it for $39.99. The current price is slightly outrageous, so you may want to wait and see if the price drops a little.
Warm and fluffy with delicious red bean goodness, it’s hard not to enjoy this traditional snack with great fondness. Not only do I get all nostalgic when eating them, I just love how my children’s face light up when they take a bite out of the sweet pancake. If you are planning to make the Imagawayaki recipe, find a relaxing weekend and enjoy the delightful snack with a cup of green tea!

Wish to learn more about Japanese cooking? Sign up for our free newsletter to receive cooking tips & recipe updates! And stay in touch with me on Facebook, Pinterest, YouTube, and Instagram.

Imagawayaki (Obanyaki)
Video
Ingredients
- 2 large eggs (50 g each w/o shell)
- 2 Tbsp sugar
- 2 Tbsp honey
- 1¼ cups whole milk
- 2 cups all-purpose flour (plain flour)
- 2 tsp baking powder
- 14 oz sweet red bean paste (anko) (2 Tbsp (50 g) per piece; to use custard cream filling, see Notes below)
- 1 Tbsp neutral oil (for greasing the pan)
Instructions
- Gather all the ingredients.

To Make the Batter
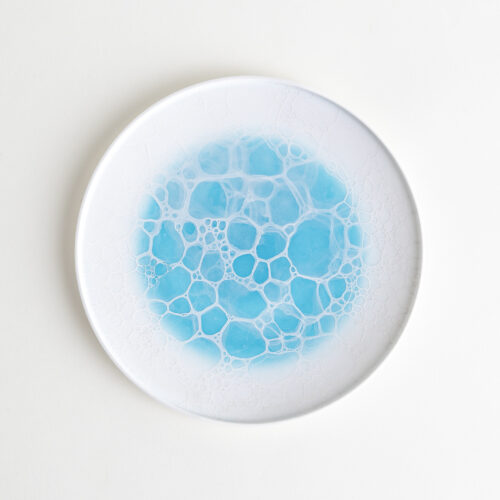
- In a large bowl, mix 2 large eggs (50 g each w/o shell) and 2 Tbsp sugar.

- Add 2 Tbsp honey and 1¼ cups whole milk and whisk it all together.

- Sift 2 cups all-purpose flour (plain flour) and 2 tsp baking powder together. Then, add it to the egg mixture.

- Mix until well combined and rest the batter for at least 15 minutes (to relax the gluten).

To Portion the Filling
- Meanwhile, scoop 2 Tbsp (50 g) of the 14 oz sweet red bean paste (anko) and make it into a round disc that fits in the center of the pancake. Repeat to get 8 portions of anko filling.

To Cook the Imagawayaki (Obanyaki)
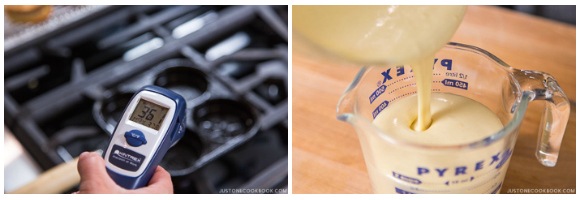
- Slowly heat up an imagawayaki pan to 350ºF (175ºC) over low heat. If you use high heat, some parts will get hot and the heat will not even. Take your time to heat up the pan.
- Dip a small piece of paper towel in 1 Tbsp neutral oil and grease the wells of the pan (mine has 4 wells). Then, use a clean paper towel to wipe off the excess oil; this is key for even color on the imagawayaki.

- When the temperature reaches 350ºF (175ºC) over low heat, pour the batter into a liquid measuring cup for easy pouring. The batter makes about 2¼ cups.
- To half (two, in my case) of the wells of the pan, add the batter halfway full and cook for 2 minutes.

- Add one portion of red bean paste to the middle of each cooking batter in the pan. Set a timer for 3 minutes. After 1 minute, pour batter into the empty wells about one-third full and cook for the remaining 2 minutes.

- [Optional] If you‘d like to use custard cream filling instead of red bean paste, use an ice cream scooper to drop the custard in the middle of the batter in the pan.

- Using a small metal spatula or skewer, pick up the two pancakes with the filling and place them filling side down on top of the pancakes without the filling.

- [Optional] If you use custard cream for filling, you may want to add a few minutes of cooking time as the custard cream was probably chilled prior to use.

- Press down gently and cook for 2 minutes. Loosen up the edges of the pancakes and remove them from the pan.

- Let cool on a wire rack. Repeat this process until you’re done with the batter.

To Serve and Store
- Serve immediately while it‘s hot/warm. Keep the leftovers in an airtight container and store in the refrigerator for 2 days or in the freezer for a month. You can defrost overnight in the refrigerator or reheat the frozen piece in the microwave (reduce power so it won‘t explode). Then, bake at 350ºF (175ºC) in the toaster oven or oven until crispy outside.


I had these at a 屋台 in Japan and they were divine… I’ve been craving them ever since I returned home. Looks like I will need to give it a try!
Hi, Julia! We’re pleased to hear you tried this in Japan!
We hope you’ll try Nami’s recipe and let us know what you think! We’d love to hear from you.
Happy cooking!
I loved these when I lived in Osaka but have since had to go gluten free. Is there a way to make them gluten free?
Hi Nancy! Thank you very much for reading Nami’s post and trying her recipe!
To make this gluten-free, how about replacing the all-purpose flour with Bob’s Red Mill Gluten Free 1-to-1 Baking Flour?
We hope this helps!